So, the last few days I kind of got lost on Pinterest (don't we all, haha). One thing led to another, until I found myself trying to figure out how I managed to open 50 tabs. Needless to say I had a blast, hopping from one topic to the next... it's been awhile since I visited Pinterest, and now I remember why. I spend countless hours exploring and pinning, getting lost in all that the site has to offer. Of course, the frequent interruptions from family and whatnot could be the reason I'm logged in for hours; or it could be that Pinterest is an addictive and genius website. Here are some amazing craft storage ideas I came across that I wanted to share with you.
A Genius Idea: Shoe Box and Toilet Paper Tubes for Craft Storage

Such a cheap and creative storage idea. Going to have to try this and jazz it up a bit.
Amazing Yarn Storage

So inspiring. Love this yarn storage. I've always wanted to do this, but haven't yet had the opportunity.
Craft Storage Redo

I adore the designs on these drawers.
Awesome Craft Storage

I love how everything has it's own special place. One of the nicest, most organized, and inspiring craft storage areas I've seen. I just love the ribbon and button storage. :)
Tutorial – How to Make Foam Core Shelves to Store and Display Your Crafting Supplies by Creative Team Member Naomi Towner

This is an amazing idea! I am going to have to try this someday.
How To Build A Custom Craft Desk

This is amazing! I'm going to have to try this. Such an awesome tutorial, and a great storage idea.
I still have a bunch of tabs open in my browser, most of them pinterest. ;) What a great site! I'll be back soon to share more interesting finds. In the meantime, check out my pinterest page for more great pins. http://pinterest.com/irieworldwide
Until next, Happy Crafting. :)
Tutorial: Upcycled Toilet Paper Roll/Tube Owls
My little monkey came to me recently and exclaimed, "Mama, I want to make owls. Can we make some owls, please?" So, being the crafty mama that I am; I said sure and we set off to find our supplies. *This project is easy enough for kindergarten/preschool/toddler ages, fun for older children/teens, and you can fancy it up to make a special gift for your adult friends.
We cut out all of our shapes, then organized them into a cup holder we had in the recycle bin.
The monkey had so much fun making these owls. He was enthusiastic and creative. Working with kids is so rewarding, especially when you see the pride in their beaming little faces once they're done. When they see what they've created, the joy they feel is beyond words.
Here are our owls half finished. Mine on the left, his on the right. The small black dots are just a template for him, so he knows how far up to put the feathers.
Our adorable finished upcycled owls. What do you think? I think they're precious, and they work up so quickly. It was a fun experience. Would you like to make your own owl? Keep scrolling to see the tutorial.
__________________________________________________________________________
Now are you ready to have some fun of your own, and recycle/upcycle in the process. This is a great craft to use up some of those old toilet paper rolls/tubes; instead of tossing them in the garbage or letting them kick around the house for the cats to play with. ;p
Owl enthusiasts and children everywhere will love these adorable little works of art.
Ready for the tutorial, let's get started.
You will need:
Toilet Paper Rolls/Tubes
Construction Paper
Pencil
Scissors
Glue Stick
Instructions:
First, make your wings, feathers, feet, beak, and eyes.
*Fold your paper a few times, then cut out your shapes. You will have a small stack of them if you do this. Copy this method for all shapes to speed up the cutting process.
For the wings, using your pencil draw a long oval. Approximately two inches long.
For the feathers, a small oval. Approximately one inch.
For the beak, a small triangle. Approximately half an inch.
For the eyes, medium white circles and small black circles. Approximately 3/4 of an inch, and almost half an inch.
For the feet, I drew three small half ovals and extended upward from each side to make a small leg. Just over 3/4 of a inch.
Got all your shapes cut out? Okay, let's continue.
Start by gluing one end of a piece of construction paper (6x9inch) to your tube.
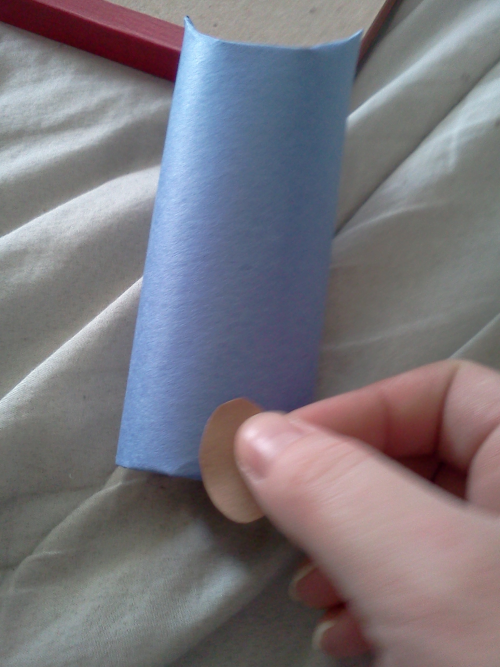
Wrap it around the tube (the long way); add glue to the other end and press to seal the seam.
Next, press one end of the paper into the tube.
Now, to make the ears. Flip tube and press gently into the center of back edge of paper (where seam meets). Do the same to the front edge of the paper.
Voila! Owl ears, wasn't that easy. Now you have your basic template to complete your owl.
Here comes the fun part, gluing all the tiny pieces onto the owl. This could get messy. ;c)
Start by adding glue to only one half of each small oval.
Press the glued half onto your owl, leaving the other half to hang freely (like real feathers).
Continue adding feathers, overlapping each new one over the previous (I only placed five feathers across the front of the owl, you may work around the back as well; if you desire).
Once you've completed one row, make another row overlapping the first; and so on... until you reach your desired spot on the owl (I made six rows of feathers).
Place the beak onto your glue stick, slide across and off glue stick, press firmly onto center of owl just above top row of feathers (overlapping a bit is fine).
Add glue to white circles, and press each firmly onto owl; one on either side of beak.
Add glue to small black circles. Press firmly into white circles in any way desired; to make a multitude of different expressions.
For the wings, glue only about half an inch of each wing.
Press wing firmly onto side of owl; at a slight angle. Repeat with other wing. Gently fold wings outward.
To add the feet, glue only the small leg part of each foot.
Press each foot firmly onto inside of tube. Then gently fold upward toward front of owl.
Voila! There you have it, an adorable upcycled owl. I hope you enjoyed this tutorial. Here are all of the owls together.
In the last picture, you may notice that I drew little white dots on the pupils with my handy dandy white marker. If you like the look and have one of your own, feel free to draw them on. Or if you're feeling adventurous, cut out two tiny white circles from your scraps; and glue them on.
**Fun ideas
For more upcycling fun. Try cutting your shapes from other recyclables (cereal/cracker boxes, magazines, newspaper, etc); the possibilities are endless.
Draw designs on your owls feathers, wings, and faces with sharpies or other markers. You could also use pens, colored pencils, crayons, or paint.
Use scrapbook paper, cardstock, or other decorative papers to wrap the tube and make the wings/feathers.
Add glitter for some sparkle. Or glue on sequins, jewels, or other embellishments. Also try colored salt for some fun texture.
Make a hair bow out of scrap ribbon for a cute girl owl.
There's so much you can do. Reach for the sky and use your imagination. The possibilities are endless. Until next time, Happy Crafting.